How to setup a chat widget in Digital Connect and embed it on your website
The chat widget on your website enables your visitors to communicate with your business in real-time. It usually pops-up in the bottom right corner of a web page and prompts visitors to chat with you bot or an agent on your chat channels.
In this tutorial, you will learn how to create and install a chat widget on your website.
Step 1: Chat Widget Settings
Here’s how you can customize the chat widget as per your requirements and generate the widget code. You can then add the widget code to Google tag manager (recommended) or to your website code.
Step 2: Install a Chat Widget using Google Tag Manager
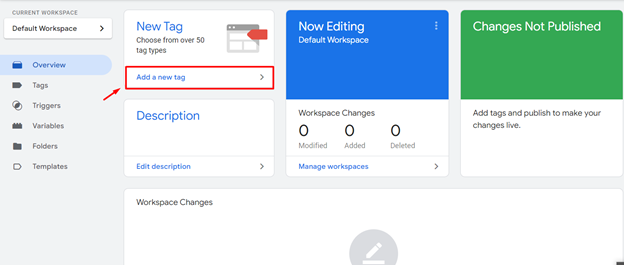
- Login to Google Tag Manager and Navigate to Tags > Add A New Tag
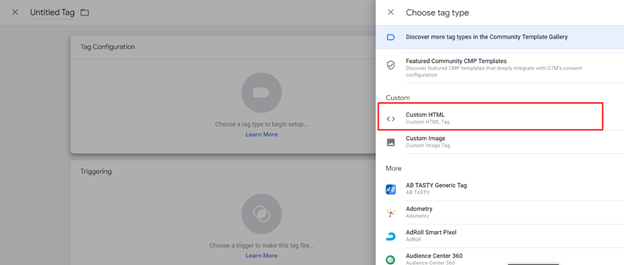
- Select Custom HTML as your tag type.
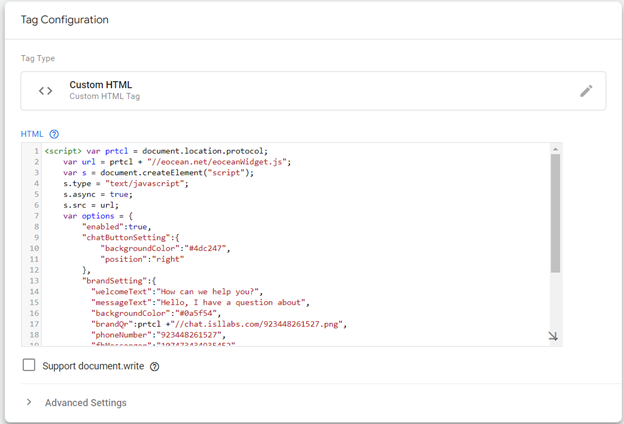
- Paste in the code snippet you have copied after creating it from Step 1 above.
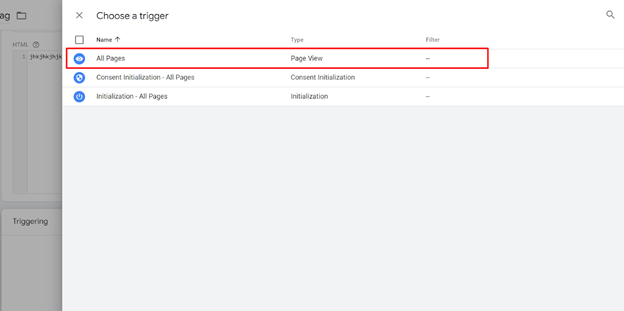
- Click Choose a trigger and select all pages
- Name and save your tag. You’re all done!
In case you don’t have Google Tag Manager already installed then install Google Tag Manager to apply the code.
Alternative Option: Embed the code snippet on your website:
- Go to the main page of your website and open its HTML code.
- Paste the full code snippet as the last line before the closing
Leave a Reply