- Help Center
-
Digital Connect API Docs
How to Set Up API Campaigns in Digital Connect
API Campaigns are mainly used for transactional messaging. WhatsApp allows businesses active on WhatsApp API to send pre-approved template messages as notifications to users. In this article, we will explore how to configure the API campaign.
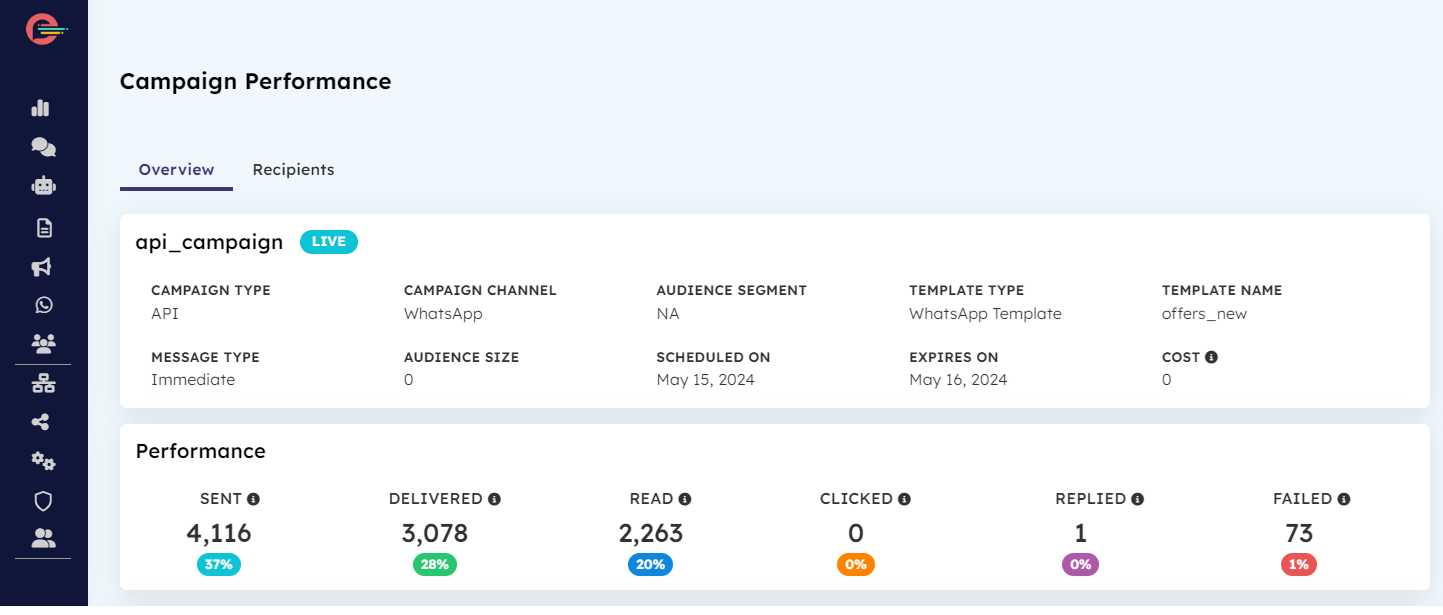
Setting up API Campaigns within the Campaign Manager on your Digital Connect account enables you to use the generated Campaign ID in API requests to initiate the delivery of transactional messages from your own business system. Additionally, you can track the performance analytics of your campaigns directly in the Digital Connect dashboard.
Prerequisites
- You must have a verified WhatsApp Business Account.
- You must have at-least one pre-approved template message.
- You must have a WhatsApp Businesss Account hosted on Cloud API.
- Tools to make HTTP/S request.
Step 1. Create an API Campaign
1. Go to Campaign Manager and click on Create Campaign

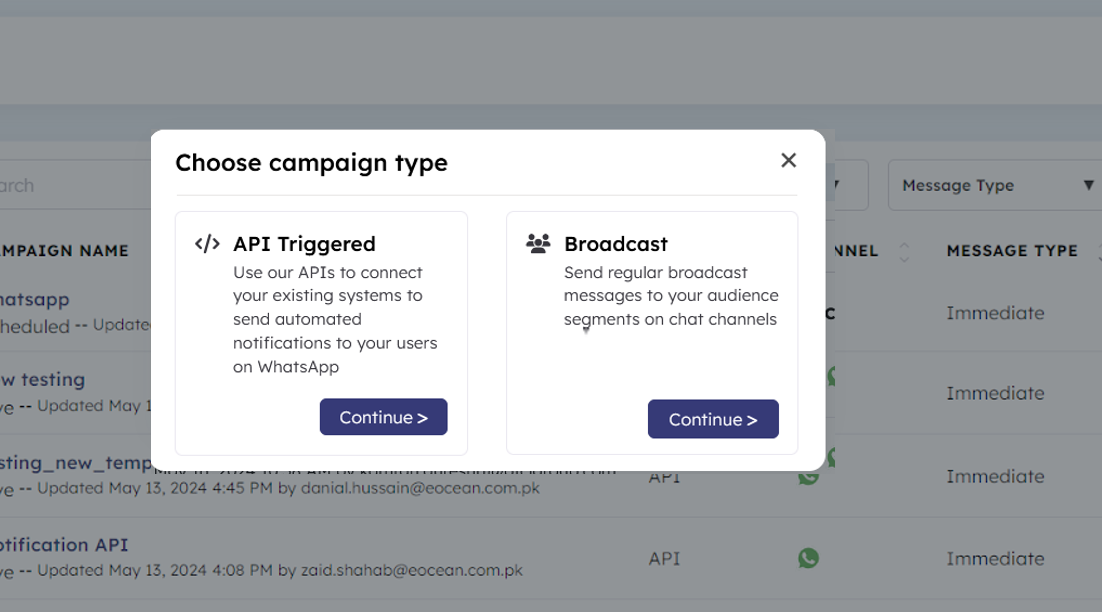
2. Select API Triggered as the campaign type and click Continue

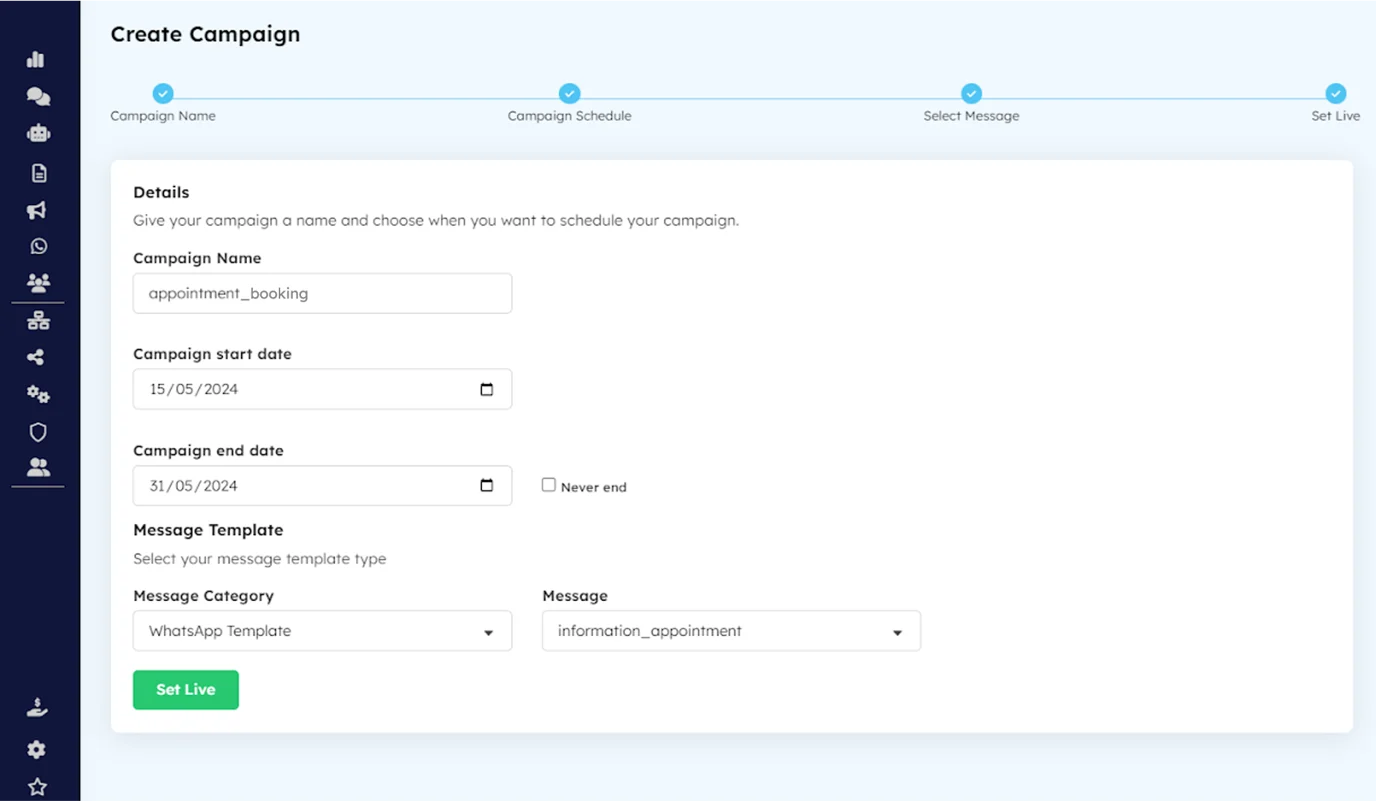
3. Provide the following details:
- Campaign Name
- Start Date
- End Date (Click Never end checkbox on-going campaigns)
- Select WhatsApp Template as Message category
- Select your template from the list next to Message Category
- Click Set Live to create your API campaign.

4. Go to Campaign Manager > Campaigns & Copy the Campaign ID of the API campaign you have just setup.

STEP 2: Generate API Key
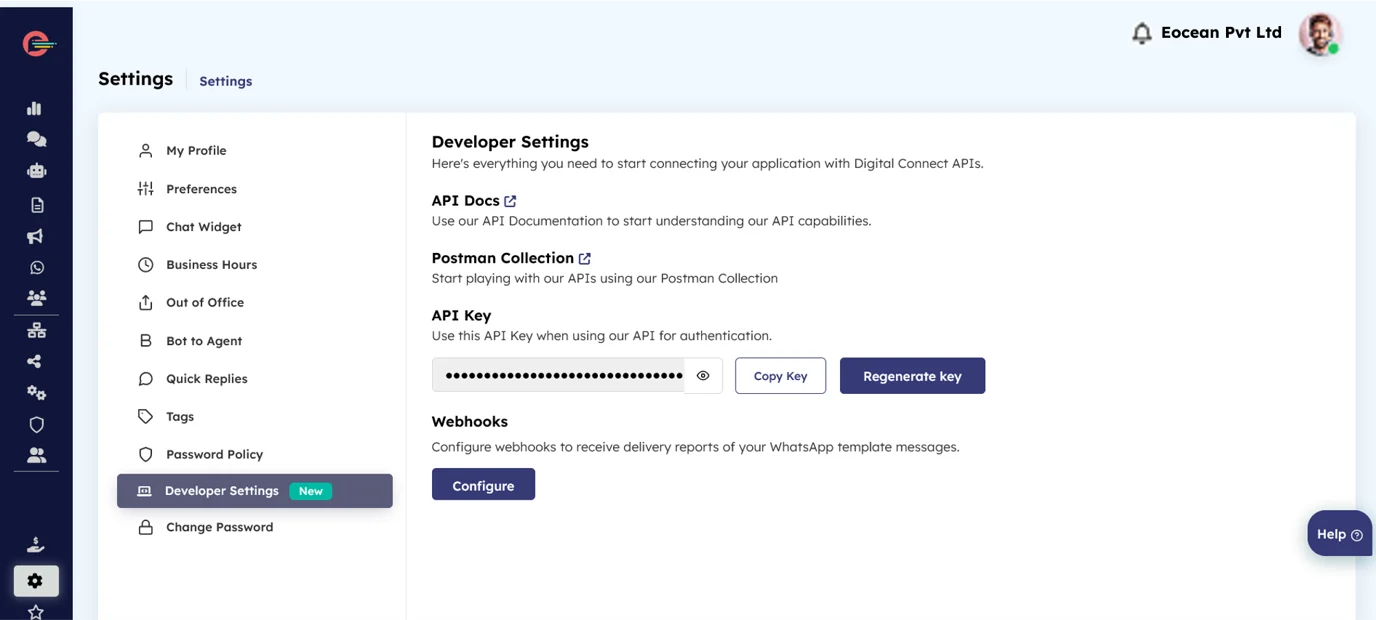
Fetch API Key from Developer Settings
To authenticate the API request, you will require the API key associated with your Digital Connect account. The API key can be found in the Developer Settings of your account. Please note that access to the Developer Settings is restricted to the platform administrator only.

STEP 3: Send notification to users
We’ll be using the Campaign ID and API key acquired in previous steps. To simplify the process of setting up messages on the business side,The API is designed to receive the parameters’ values to be filled in templates before sending them to users.
Here is a breakdown of the API fields to provide you with more information and understanding.
| Fields | Data Type | Description |
|---|---|---|
| apiKey | String (required) | The apiKey which will be retrieved from Developer Settings |
| source | String (required) | Set source as “api” in this case |
| countryCode | String (required) | Country code of receiver For instance +92, +44 etc. |
| campaignId | String (required) | Campaign Id which will be copied from Campaign Summary |
| templateParams | String (required) | If there is a parameterized template then this field must be used. |
Let’s send our first notification.
In your API campaign request payload:
- Paste the Campaign ID.
- Fill in the required parameters such as countryCode, source and apiKey etc.
- Deliver your message to the designated recipient’s phone number..
Method: POST
URL with endpoint: https://eoceandigitalconnect.com/v2/api/outgoing/message
Payload for Non Parameterized Campaign:
JSON (raw-body):
{
“apiKey”:
“eyJhbGciOiJIUzI1NiIsInR5cCI6IkpXVCJ9.eyJwaG9uZU51bWJlciI6IjkyMzMyOTQ2Nzc4
OCIsIm9yZ1VuaXRJZCI6InVmb25ldWF0IiwiZW1haWwiOiJ0ZXN0dWZvbmV1YXRAZ21h
aWwuY29tIiwicGhvbmVOdW1iZXJJZCI6IjEyNzI0MDEzNzE0MjUyMCIsImlhdCI6MTcxNT
cyMTU4MX0.OtxUjRCTepOL2wzy0Q-0xzdFTujI_3icIt_-I9pt3Eg”,
“source”: “api”,
“countryCode”: “+92”,
“receiver”: “92XXXXXXXXXX”, //Receiver Whatsapp Number
“campaignId”: “WACAMP_XXXXX” //Your Copied Campaign ID
}

Payload for Parameterized Campaign:
JSON (raw-body):
{
“apiKey”:
“eyJhbGciOiJIUzI1NiIsInR5cCI6IkpXVCJ9.eyJwaG9uZU51bWJlciI6IjkyMzMyOTQ2Nzc4
OCIsIm9yZ1VuaXRJZCI6InVmb25ldWF0IiwiZW1haWwiOiJ0ZXN0dWZvbmV1YXRAZ21h
aWwuY29tIiwicGhvbmVOdW1iZXJJZCI6IjEyNzI0MDEzNzE0MjUyMCIsImlhdCI6MTcxNT
cyMTU4MX0.OtxUjRCTepOL2wzy0Q-0xzdFTujI_3icIt_-I9pt3Eg”,
“source”: “api”,
“countryCode”: “+92”,
“receiver”: “92XXXXXXXXXX”, //Receiver Whatsapp Number
“campaignId”: “WACAMP_XXXXX” //Your Copied Campaign ID
“templateParams”: [ //Your parameters for the template
“Parameter 1”,
“Parameter 2”
]
}

By completing these steps, you will successfully establish and manage an API-triggered campaign, while also gaining valuable insights into its performance metrics.


Leave a Reply