- Help Center
- Support Channels
-
Web Chat
Add Live Chat as a Digital Connect Channel
Add live chat as a Digital Connect channel to manage conversation between your website visitors, bot and agents.
Browser Compatibility
The live chat widget works with most modern web browsers. Here are the supported browsers:
- Google Chrome
- Microsoft Edge
- Apple Safari
- Mozilla Firefox
Follow the steps below to create a live chat channel.
- Click on Channels > Web Messaging and then click Add Integration.
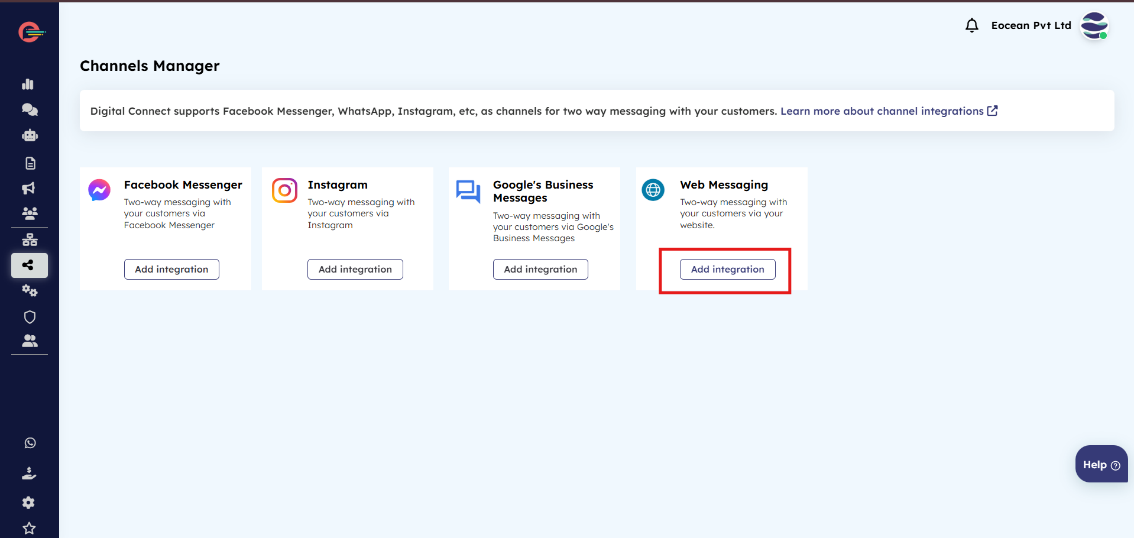
- Click on Pre-Chat form on your Web Chat Widget page. You will see the following screen.
Pre-Chat Form tab
You can use Pre-Chat form to collect information about your website visitors as soon as they click on your live chat widget. You can use this to collect name, e-mail address, and other details before initiating the conversation.
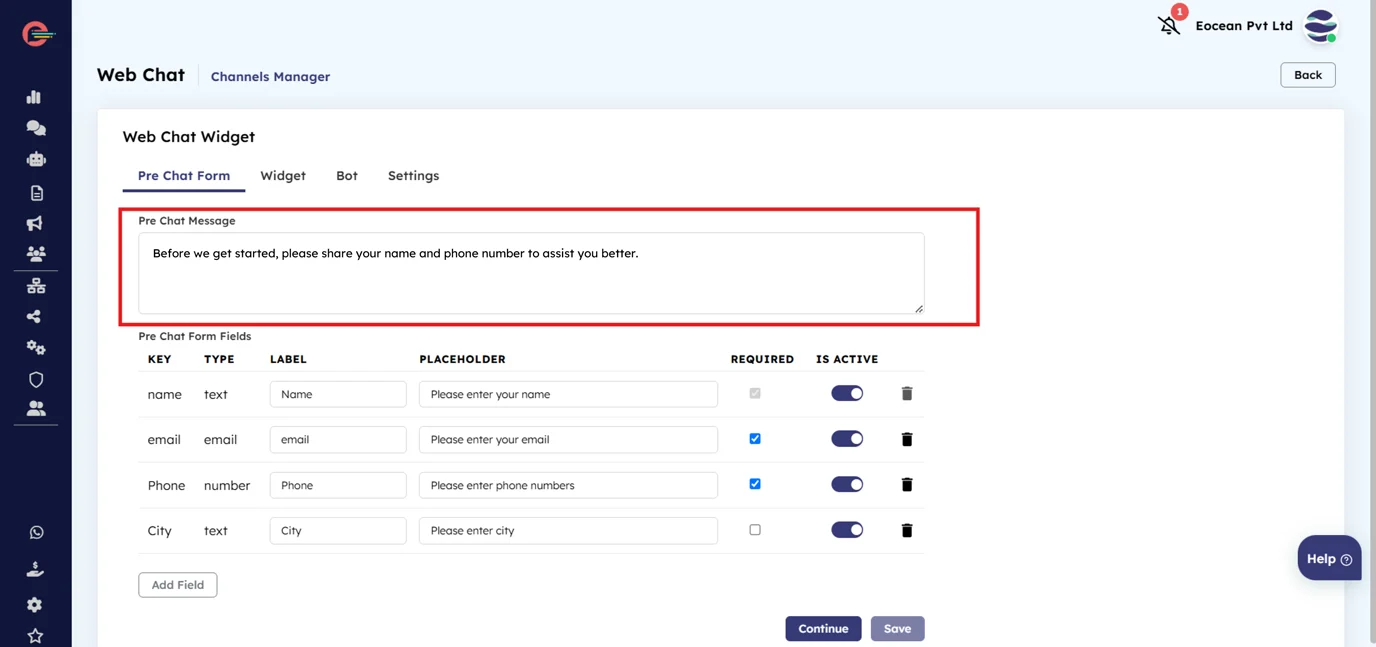
These fields are explained below:
-
Pre Chat Message
Write a message to start a conversation with the customer. For e.g., “Before we get started, please share your name and phone number to assist you better.” -
Pre Chat Form Fields
Enabling this option will add a pre-chat form to your Website Chat. If enabled, your website visitors will be presented with a form to fill out before they initiate a conversation. With this option enabled, you can include additional custom fields when necessary. You must set the Visibility for the fields and mark them as Required or Optional depending on your preferences. You can also Modify and Delete the custom form fields.
Name is the only standard field for the Pre Chat form and cannot be deleted.
- Click Save and then click Continue to move the next screen.
Widget tab
Click on the Widget tab to customize the text and appearance of your web widget on this page. You will be able view how your widget looks in the Preview on the right..
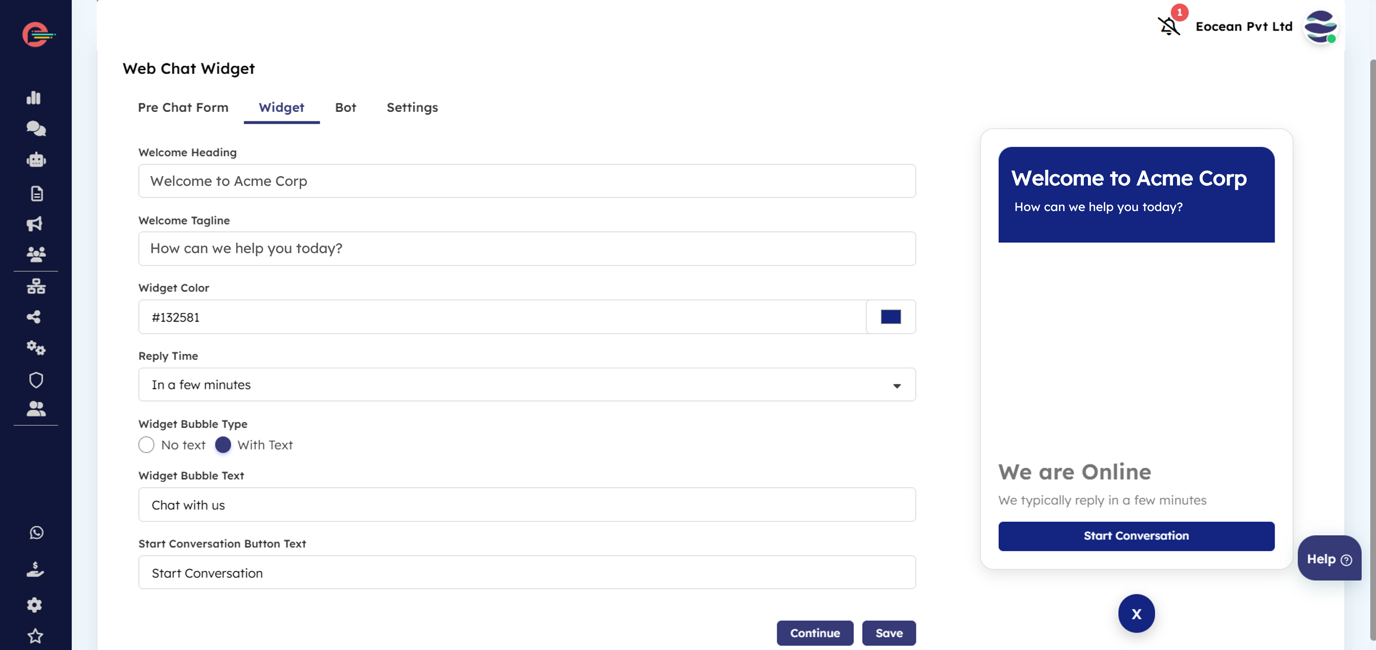
These fields are explained below:
- Welcome Heading
Write a greeting message to be displayed at the top of the widget for your customers. For e.g., “Welcome to Acme Corp.” - Welcome Tagline
Write a tag line to be displayed under the welcome heading. For e.g., “How can we help you today?” - Widget Color
Click the color palette and select a color to match your widget with your website’s branding. - Reply Time
Set a realistic response time with instant bot replies or agent responses within minutes to a day - Widget Bubble Type
Customize your widget bubble to grab attention—choose to display it with custom text or keep it subtle without text. For e.g., “Chat with us.” - Start Conversation Button Text
Write text for the the button to inform users clicking it will start a chat session.
Bot tab (Optional)
Click on the Bot tab to go to the Bot settings page. You can manage your bot here to interact with your website visitors when they click the live chat widget to initiate a conversation.
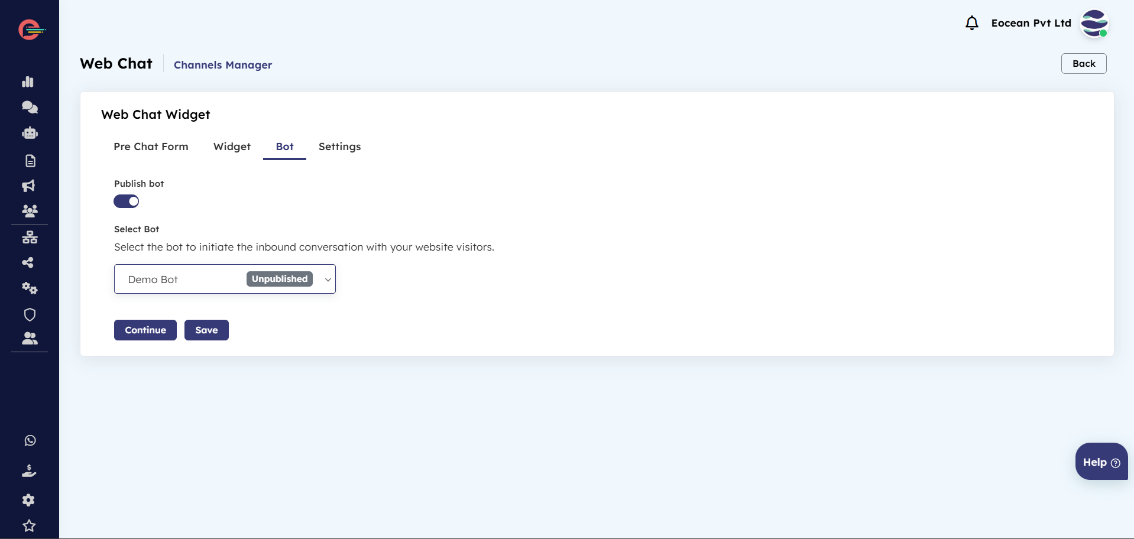
- Publish Bot
Enable the Publish Bot toggle to select a bot for your Web channel. If you haven’t created a bot or prefer visitors to interact with agents, keep this toggle disabled and enable out of office for your web channel to inform visitors of agent availability hours. - Select Bot
Select a Bot from the drop down to publish on your web channel. When a bot is published, it will have a ‘Published’ label next to it. If you select a new bot, the currently published bot will be marked as ‘Unpublished’ and the new bot will be labeled as ‘Published’ for easy identification.
Only Bots created for Web channel will be shown in the drop down menu.
Settings tab
Click on the Settings tab to manage your website URL and Property ID. The Property ID in a chat widget typically refers to a unique identifier assigned to the widget or the specific instance of the chat service on your website.
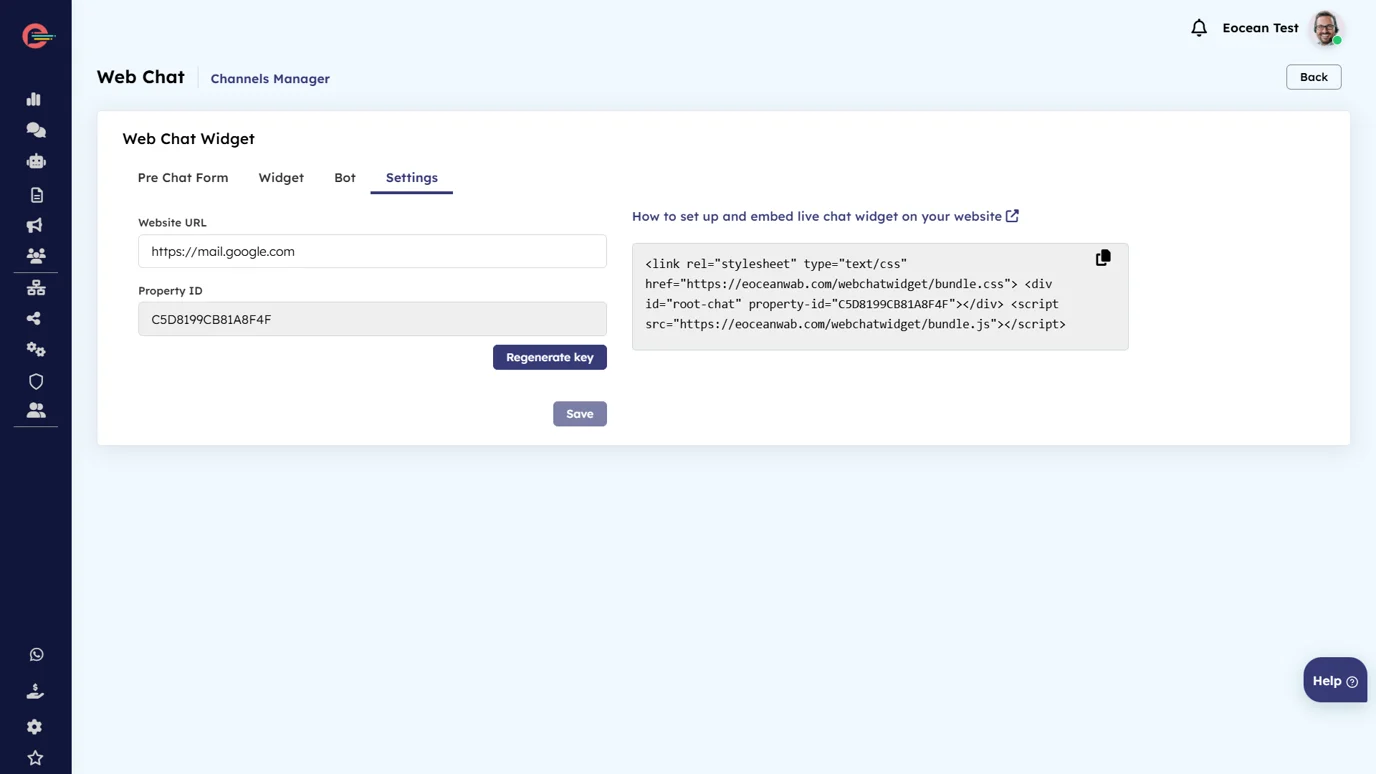
Regenerating the key for Property ID will create a new identifier for your live chat widget, which may disconnect the previous widget. To restore functionality, update your site’s widget code with the new Property ID.
- Website URL
Enter your website URL. For e.g., www.example.com - Property ID
View the property ID here. You can generate a new key for your Property ID here.
Click Save and click on the copy button to copy the code into your website.
Learn how to add a live chat widget to your website.

Leave a Reply