How to Build a Bot? A Step by Step Approach
A chatbot is a software that simulates human conversation to solve customer queries and allows companies to communicate with their audiences instantaneously.
Chatbots can be used to help automate repetitive conversational tasks like collecting information, resolve customer issues, create unique marketing experiences, provide answers to FAQs and connect to human agents if needed.
Eocean Digital Connect lets you build smart, functional bots across many communication channels without writing a line of code. Sounds pretty cool right?
This article will guide you through the steps required to build a conversational bot. However, it is strongly advised to read the article about Action Blocks to get a better understanding of bot builder before creating your first bot.
Let’s begin!
Build a bot
In our example, we will create a bot with two menu options.
- Collect user contact details to register them for a product launch wait list
- Enable users to chat with human agents.
- Create bot profile
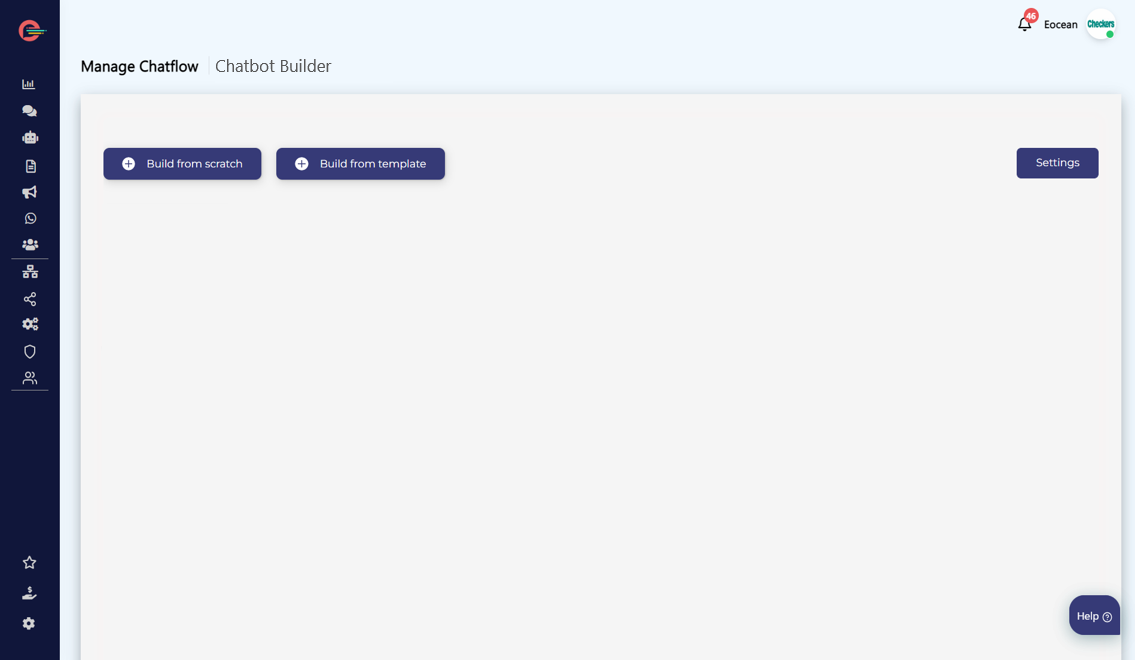
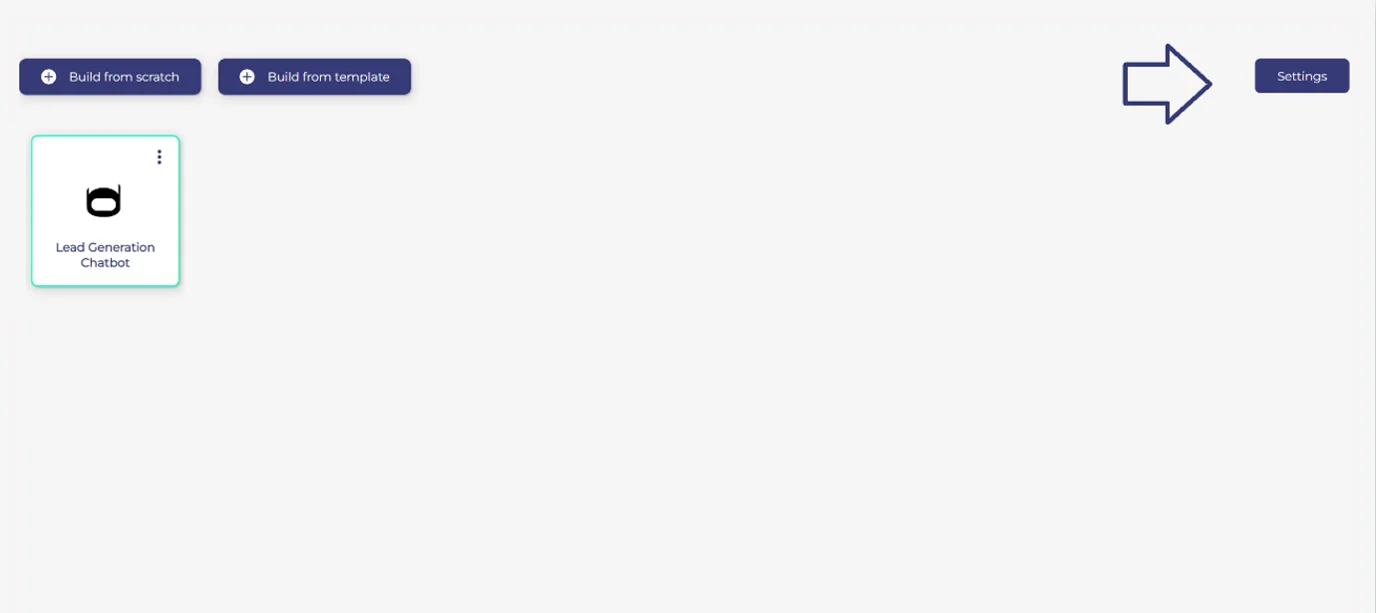
- Click on Chatbot builder in left navigation pane to access the builder dashboard and then click Build from scratch to access the builder canvas.
If you are new to the bot building tool, it is recommended for you to build your bot using one of our available templates. Choose from different templates provided by our experts that fit your use-case.
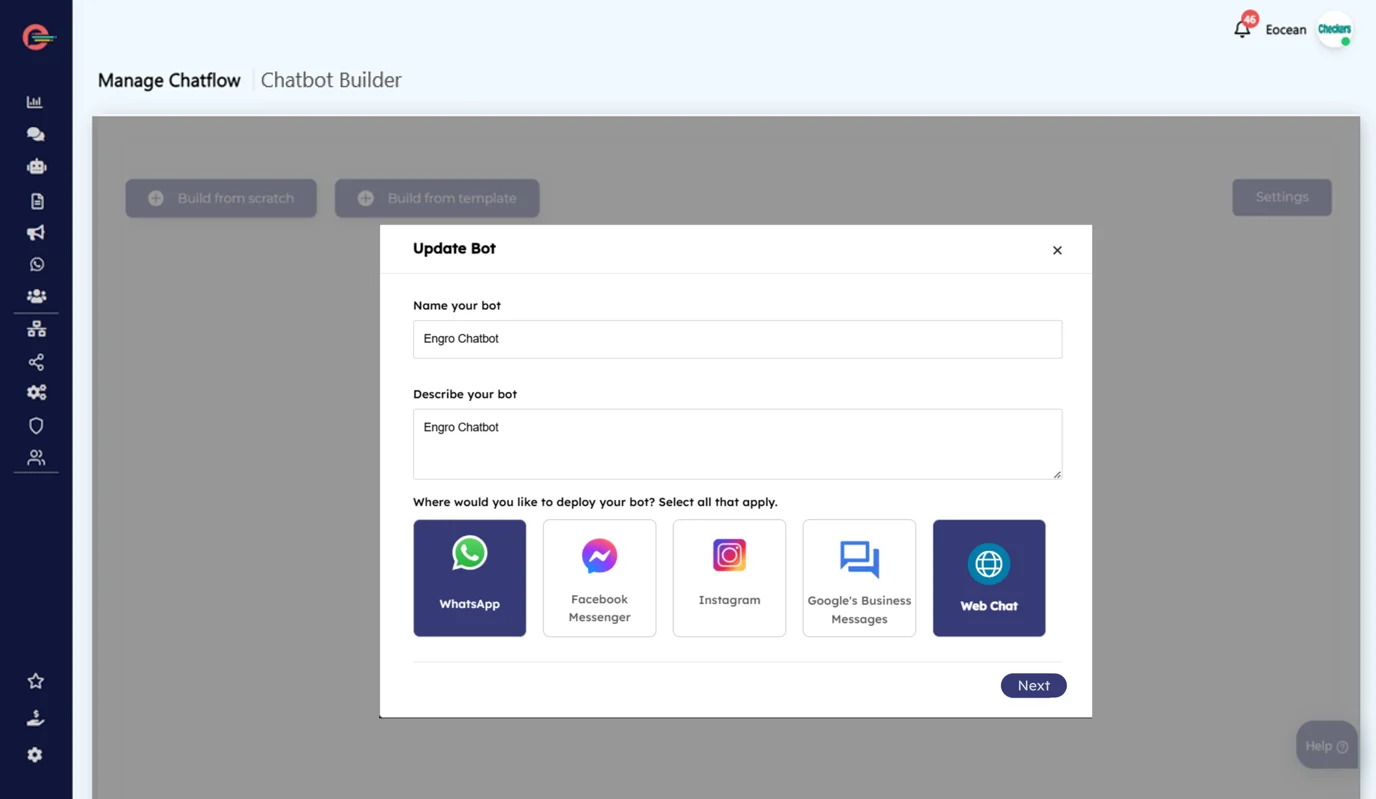
Name your bot
Provide a unique name to your bot to identify it later.
Describe your bot
Provide a brief description about the intended purpose of your bot
Choose your channel
Select the channel on which you would like to deploy your bot. Digital Connect allows you to build your bot for WhatsApp, Facebook Messenger, Instagram, Google’s Business Messages and Web Channel.
It is mandatory to integrate your channel with your Digital Connect account before deploying the bot. Learn more about integrating channels on this link.
Check this link to learn more about the type of media supported by each channel before selecting your bot channel.
You can always edit and deploy a bot to another channel at any time.
- Create Bot Menu using the Message Block
Bot Menu is made up of different options connected to each other to trigger a bot flow. it’s like a mini-website built into your website chat widget. Depending on what the user clicks on, the bot then prompts another set of options for the user to choose from and so on.
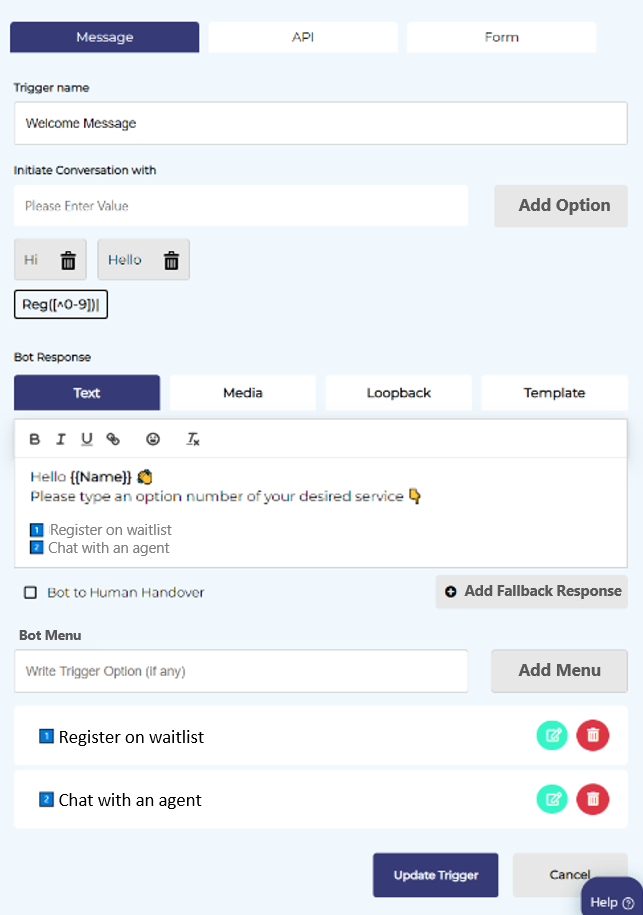
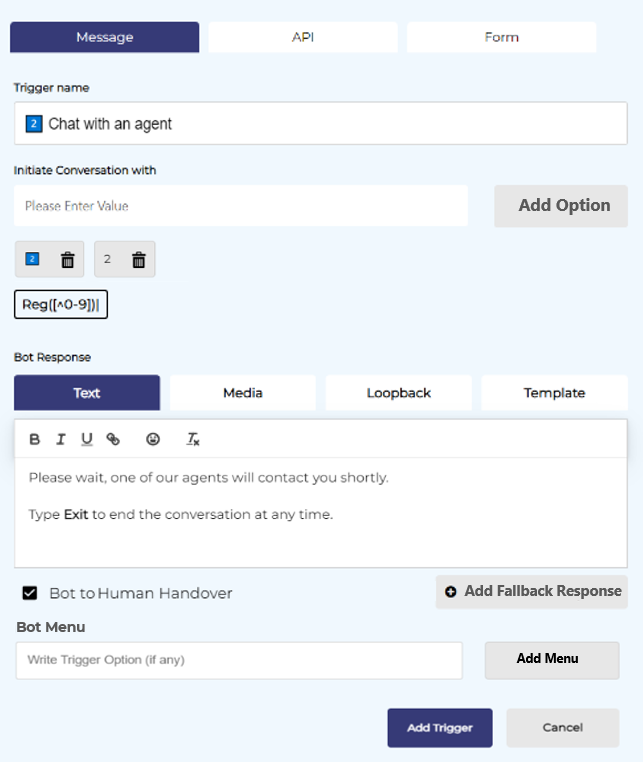
- Click on Add Trigger within the builder canvas to open the Message block tray
Trigger Name
Provide your trigger a name to identify your trigger.
Initiate Conversation with
In Initiate Conversation with section, provide keyword(s) such as Hi, Hello etc. that will trigger a bot flow when a user sends that keyword to your bot.
Bot Response
In a Bot Response section, add a message that your bot will send back to the user such as a greeting or a welcome message in response to the user input . It can be a text, media or a template message.
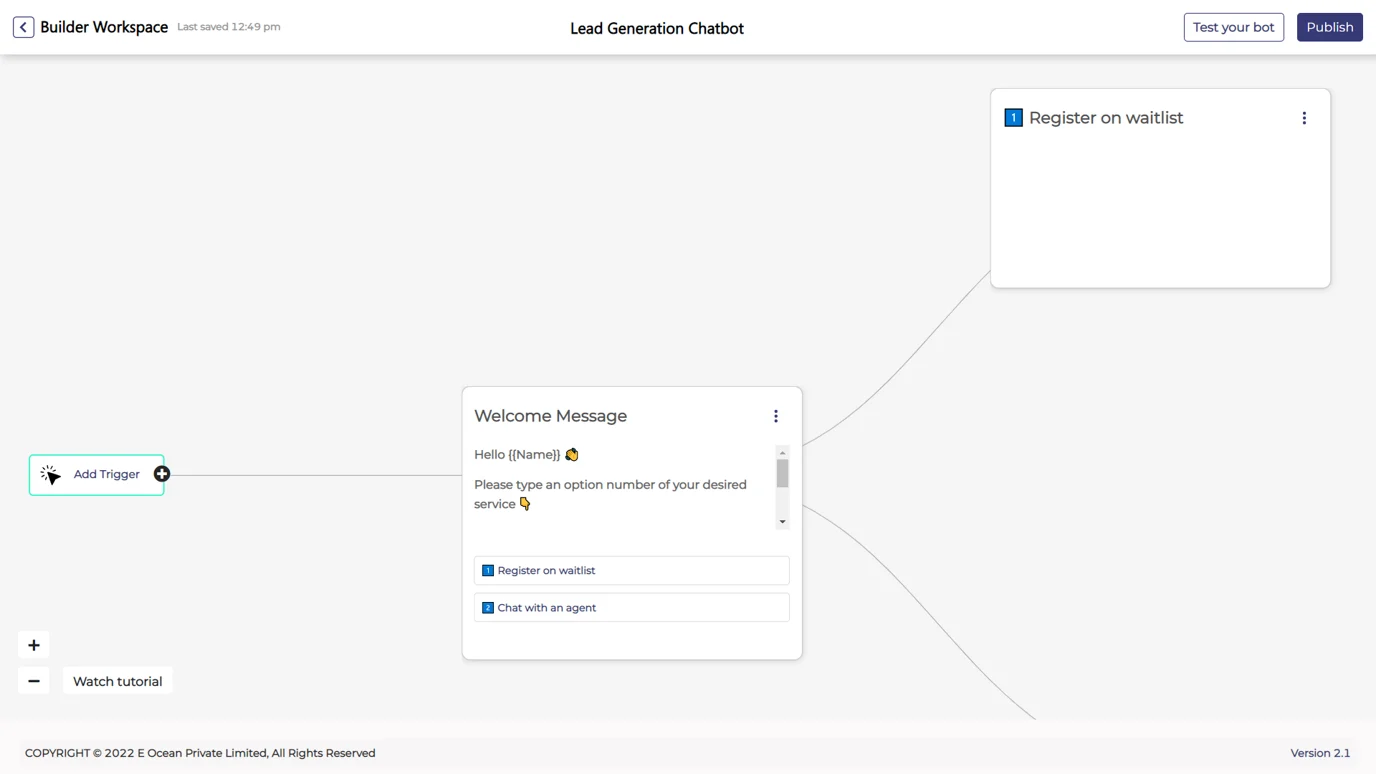
Bot Menu
In Bot Menu section, you can navigate users down a desired flow when user selects a menu option. In this case, we will add two menu options for users to choose from.- Register on waitlist
- Chat with an agent
- Click on the Update Trigger to save the bot flow.
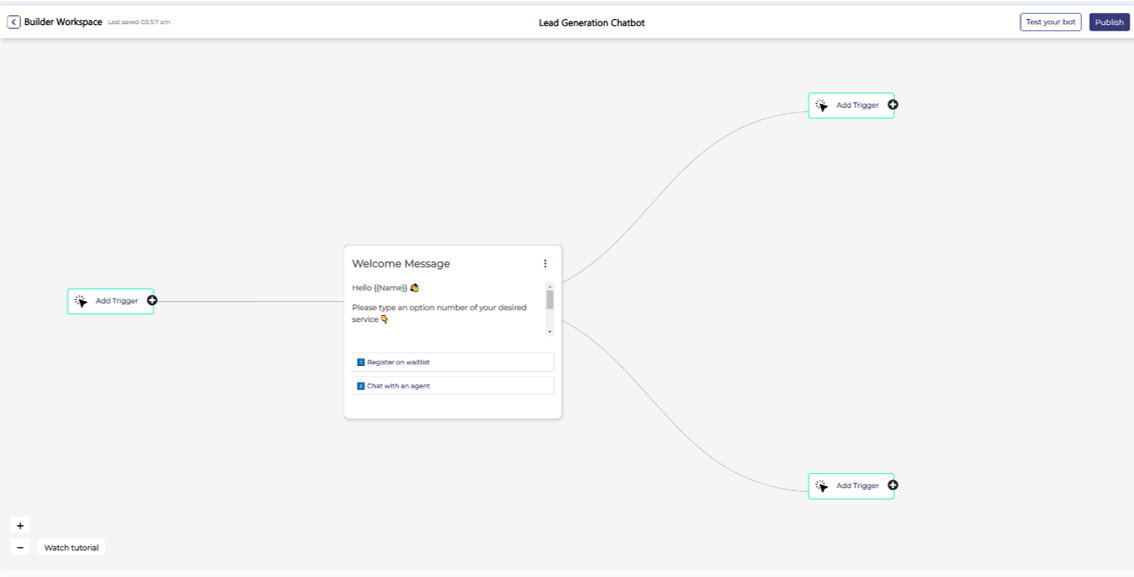
Awesome! Your bot flow will now appear on the builder canvas. You can zoom in by clicking on the buttons on bottom left side of the canvas to edit the flow .
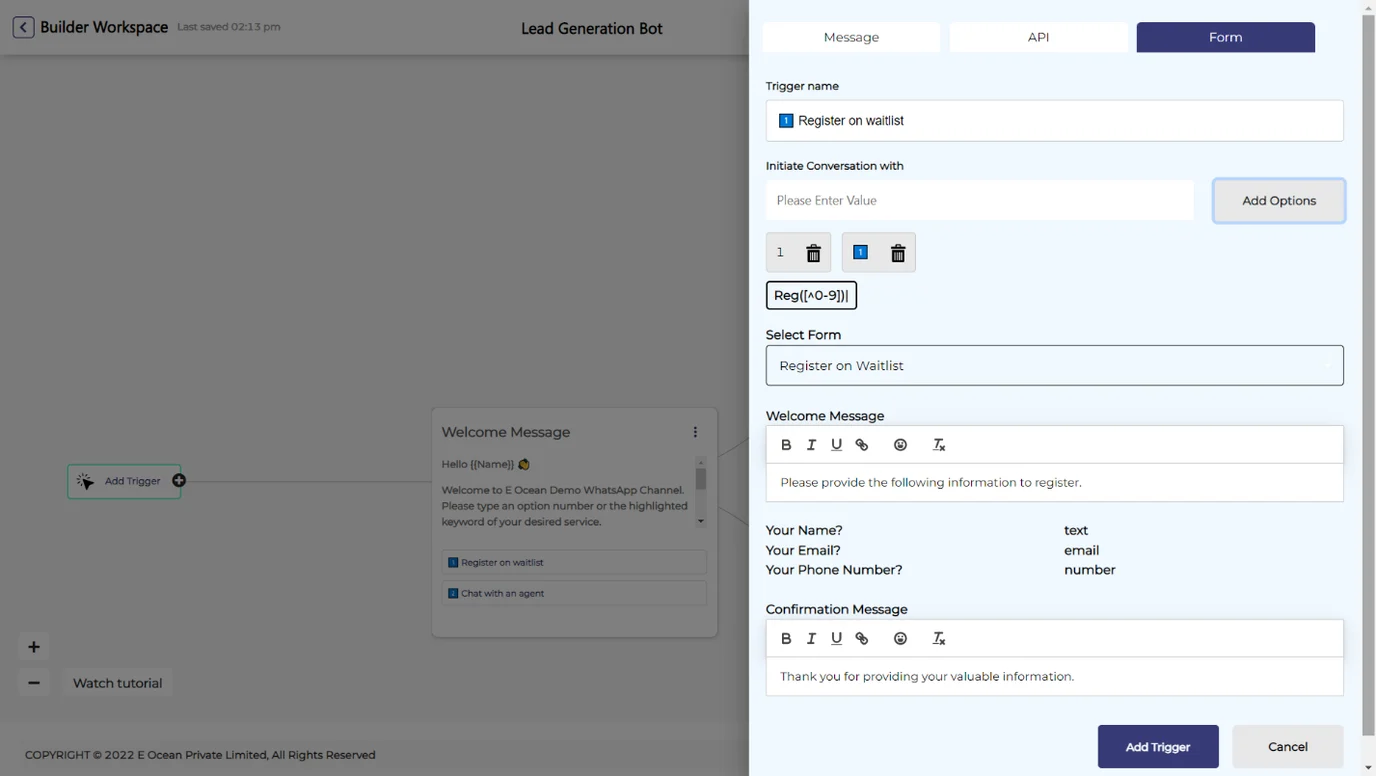
Now that you have created the bot flow, your bot needs to collect user input if the user selects the option to Register on waitlist. For this use case, we will use the Form Block to create step by step conversational form to collect user data.
- Create a conversational form using the Form Block
- Go to the Builder canvas and click on Settings.
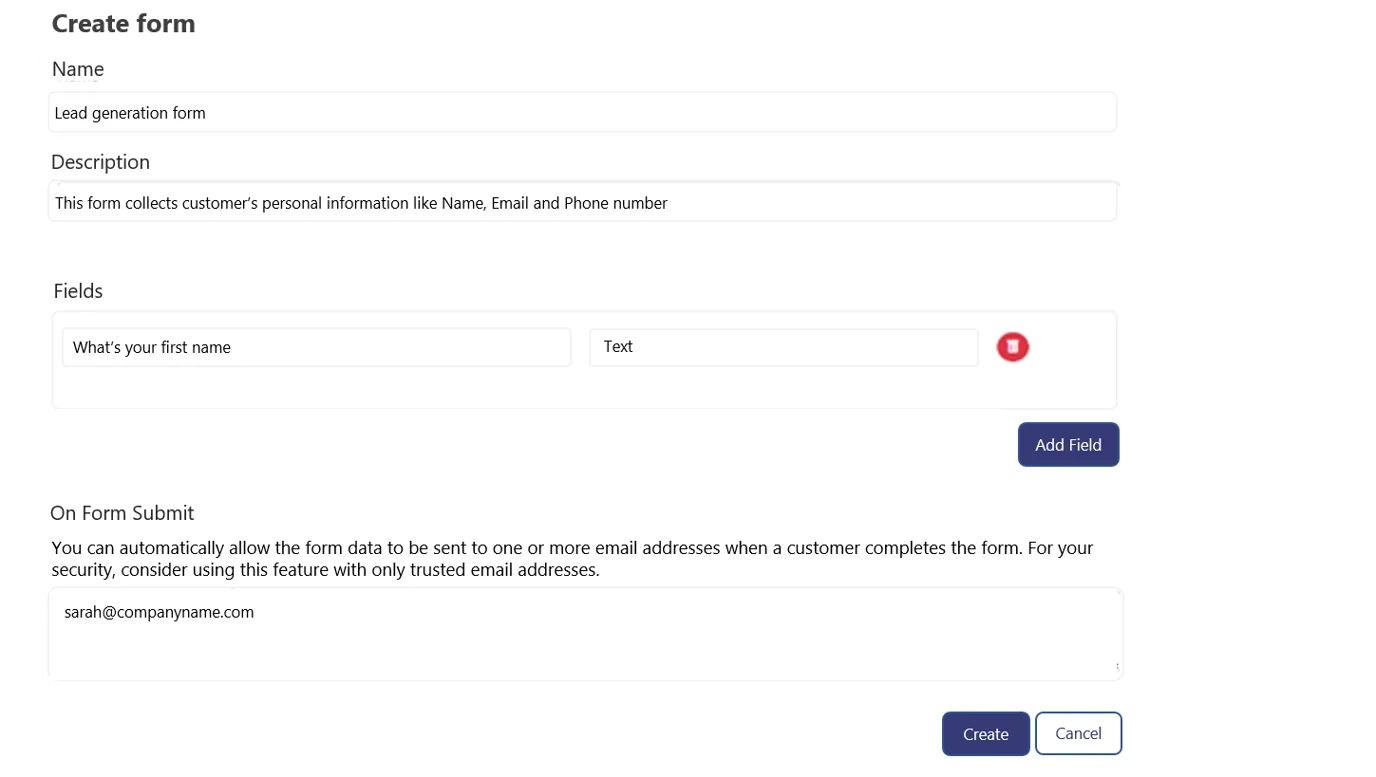
- Navigate to Form Builder > Create Form to start creating a new form
Form Name
Provide a name for your form.
Form Description
Provide a description about the intended purpose of the form.
Form Fields
Add customer form fields one at a time and provide field name and field type (validate as text, email, number, regular expression) for each field.
On Form Submit
You can provide a trusted email address to receive form data upon form submission.
You can also view the submitted user responses inside the bot builder settings section
- Once you have created a form, you can select the newly created form from the drop-down list within the Form block and provide a Welcome Message to introduce your users to the form and a Confirmation Message to thank them for submitting the form responses.
- Click on Add Trigger to save the bot flow
You can see that as you add triggers, the bot flow will be updated on the builder canvas.
- Bot to Human handover
We will now create a bot flow for Chat with an agent, our second option within our bot menu.
- Create the trigger for Bot to Human Handover with trigger name, keywords and Bot response as you added for the message block in the previous section.
- Click the Bot to Human Handover check box to allow the user to route the bot conversation to a human agent.
- Click on Add Trigger to update the bot flow.
Your updated bot flow will now be visible on the builder canvas.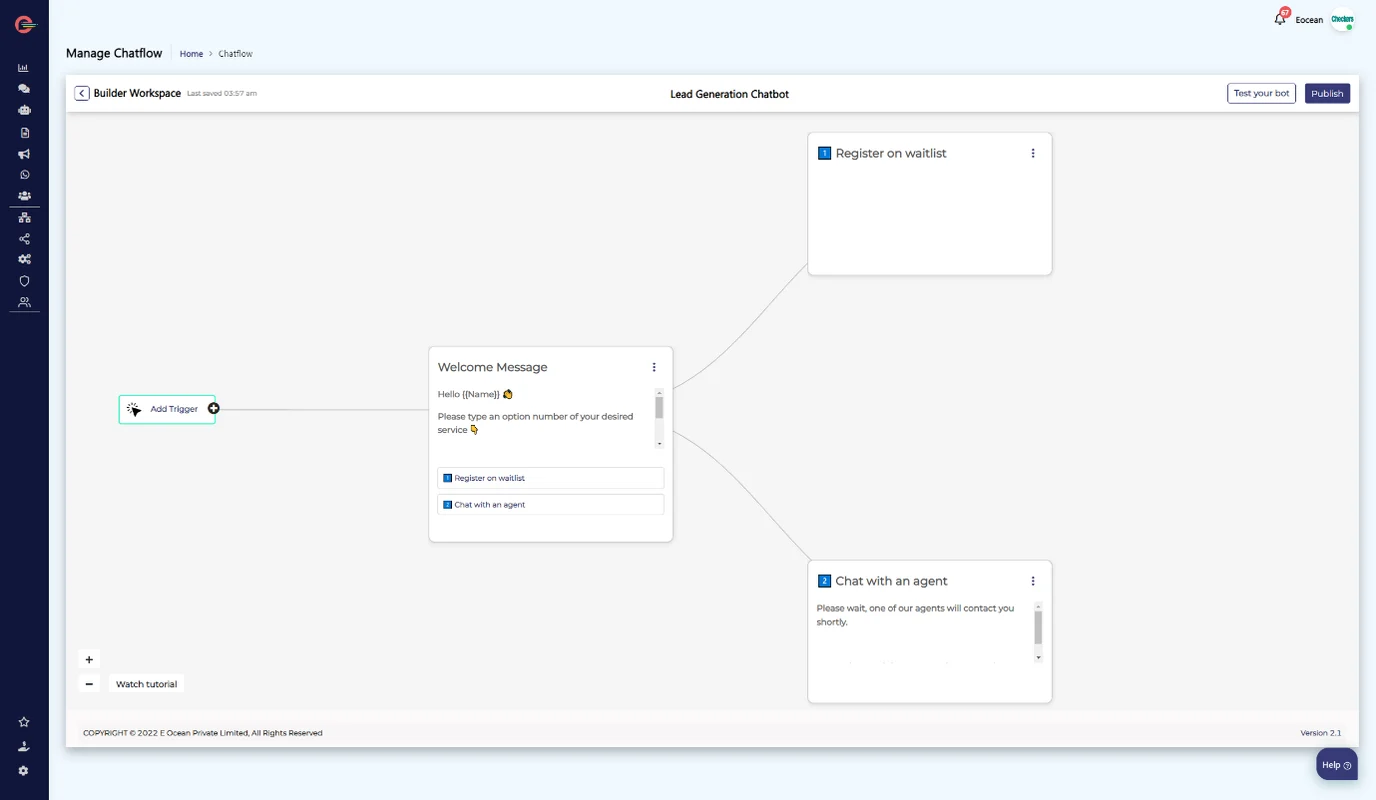
Once, you have completed the flow for your bot, its time to test your bot.
- Test your bot flow
You can test your bot flow in real time using the Test your bot feature. This feature enables you to see if your bot behaves the way its intended to and fix any issues and errors bot before publishing it.
- Click on Test your bot to activate the preview window and simulate the bot conversation

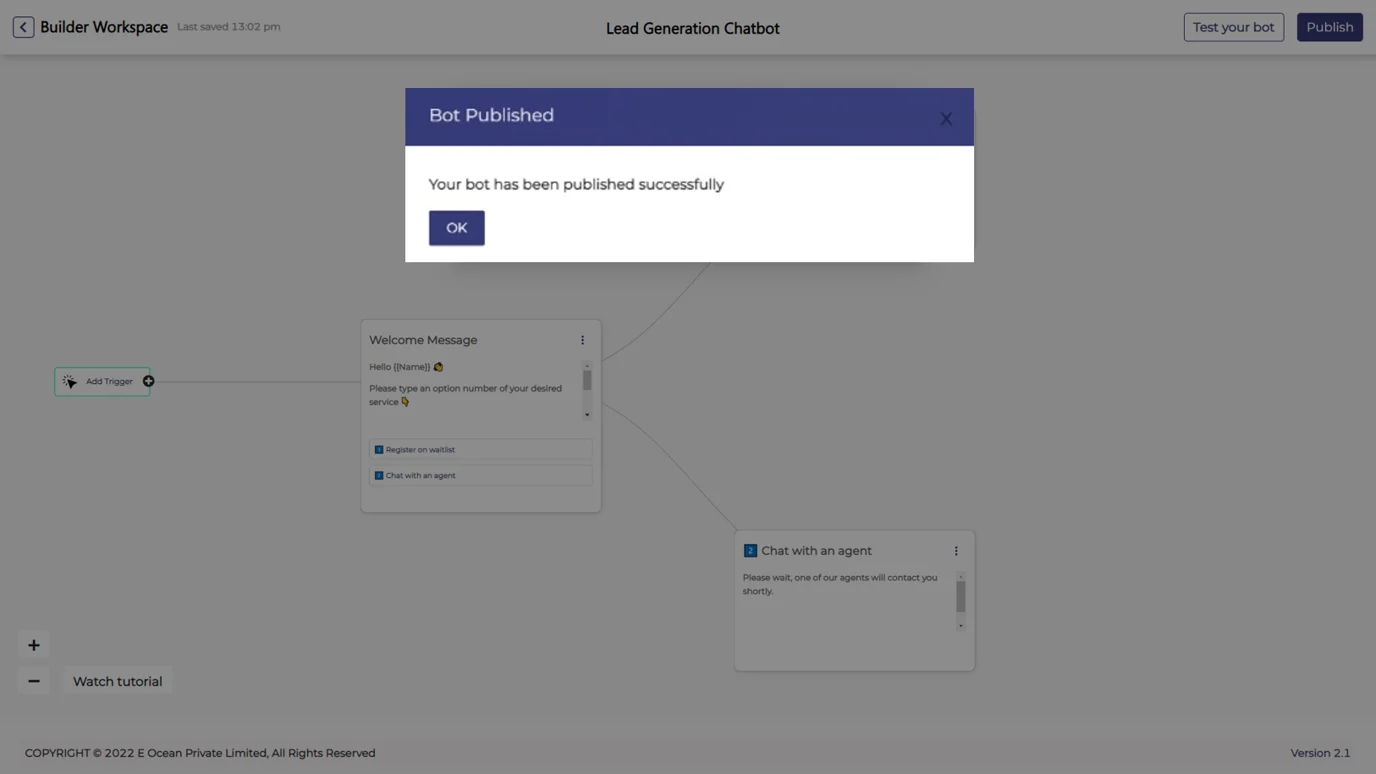
- Publish your bot
Finally, its time to publish the bot on your channel to let your bot engage with your users.
Before publishing your bot, It is recommended to add a chat widget on your site to let your customers have a real-time direct line of communication with your bot and support agents in your company without having to wait on email or telephonic correspondence. If you’ve not already added the code snippet on your web, you will need to do so, so that your channels widget can pop-up on your website for your customer interaction. For more information on how to install a widget, please refer to this article
- Click on Publish and a modal will appear. Click Yes to publish the bot on your channel.
- Analyze the results and Improve
Navigate over to Insights dashboard and see your bot conversations grow.
Leave a Reply